This section explains the Image Detection functionality and its settings.
Image Detection Functionality
The Image Detection Step checks whether a specified image appears on the screen.
You can configure actions for both successful detection and failed detection.
By default, when an image is successfully detected, the center of the detected image is tapped.
Image Detection Settings
Detection Image
The detection image can be set when adding a step or by tapping the ✏️ icon when editing a step.
You can specify the image using one of the following three methods:
- Capture Screen
Takes a screenshot of the device’s screen, allowing you to select a specific area for detection.
- Select from Gallery
Chooses an image from the device’s gallery, where you can crop the required portion.
- Select from Registered Images
Selects an image that was previously registered in the Image Detection feature.
If you select Capture Screen or Gallery, a screen will be launched to select the required area for detection.
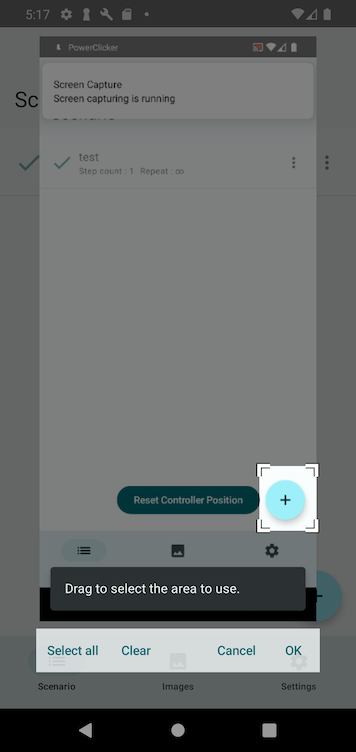
In this tool, you can drag to select the required area.
The highlighted portion will be registered as the detection image in PowerClicker.
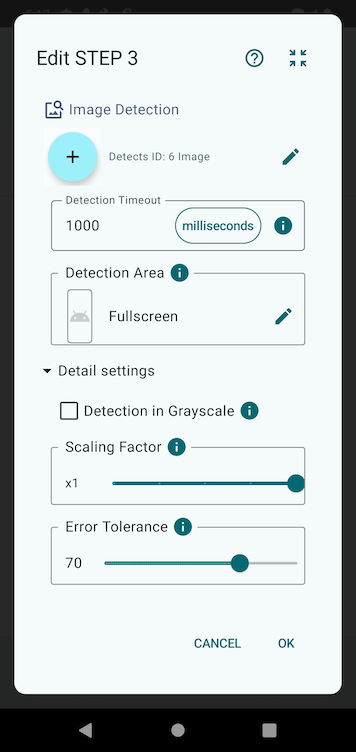
Detection Timeout
Specifies the maximum time to wait before considering detection as failed.
You can tap the unit field to change the time unit.
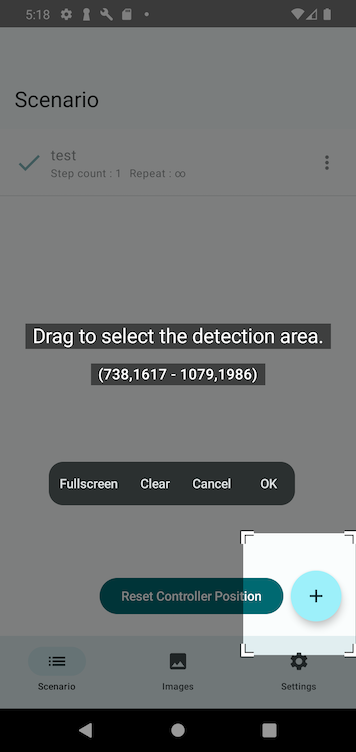
Detection Area
Limits the image detection process to a specific region of the screen.
Using the Detection Area Selection Tool, you can define the highlighted region as the area to be scanned.
If the target image appears within this area, detection is considered successful.
Setting an appropriate detection area can improve accuracy and efficiency, so it is recommended whenever possible.
Detection in Grayscale
Converts both the screen and the detection image to grayscale before matching.
If color is not important and the image can be identified by its shape, grayscale detection can improve detection accuracy and efficiency.
Scale Factor
Resizes both the screen and detection image by a specified scale before performing detection.
For simpler images, reducing the size can increase processing efficiency.
Error Tolerance
Adjusts the error tolerance for detection.
- Higher values make detection easier but increase false positives.
- Lower values reduce false positives but make matching more strict.
Post-Detection Actions
You can specify separate actions for successful and failed detections.
If detection succeeds, actions such as tapping the detected target can be performed.
If Image Detection Does Not Work Properly
If image detection is not functioning as expected, please refer to the FAQ section related to image detection for troubleshooting.